Taiwanese Beef Noodle Soup

_MG_6130

Every once in a while, I get an odd sense of loneliness, not because I don’t have any friends, but because of a disconnection from my upbringing that I’m usually ok with it. You see, its not that I hate the heritage or my past, but the associated humid and sticky summers in Taiwan and awful elementary school system that comes along with it.

_MG_6105

I found myself craving this dish, frequently made by my grandmother. This was triggered when I found out that my grandmother had gone on a month long trip to Taiwan. With a strong desire to procrastinate from any midterm-associated studying, I set out to 99 ranch to embark on an seemingly impossible journey to a rich beefy broth.

Untitled

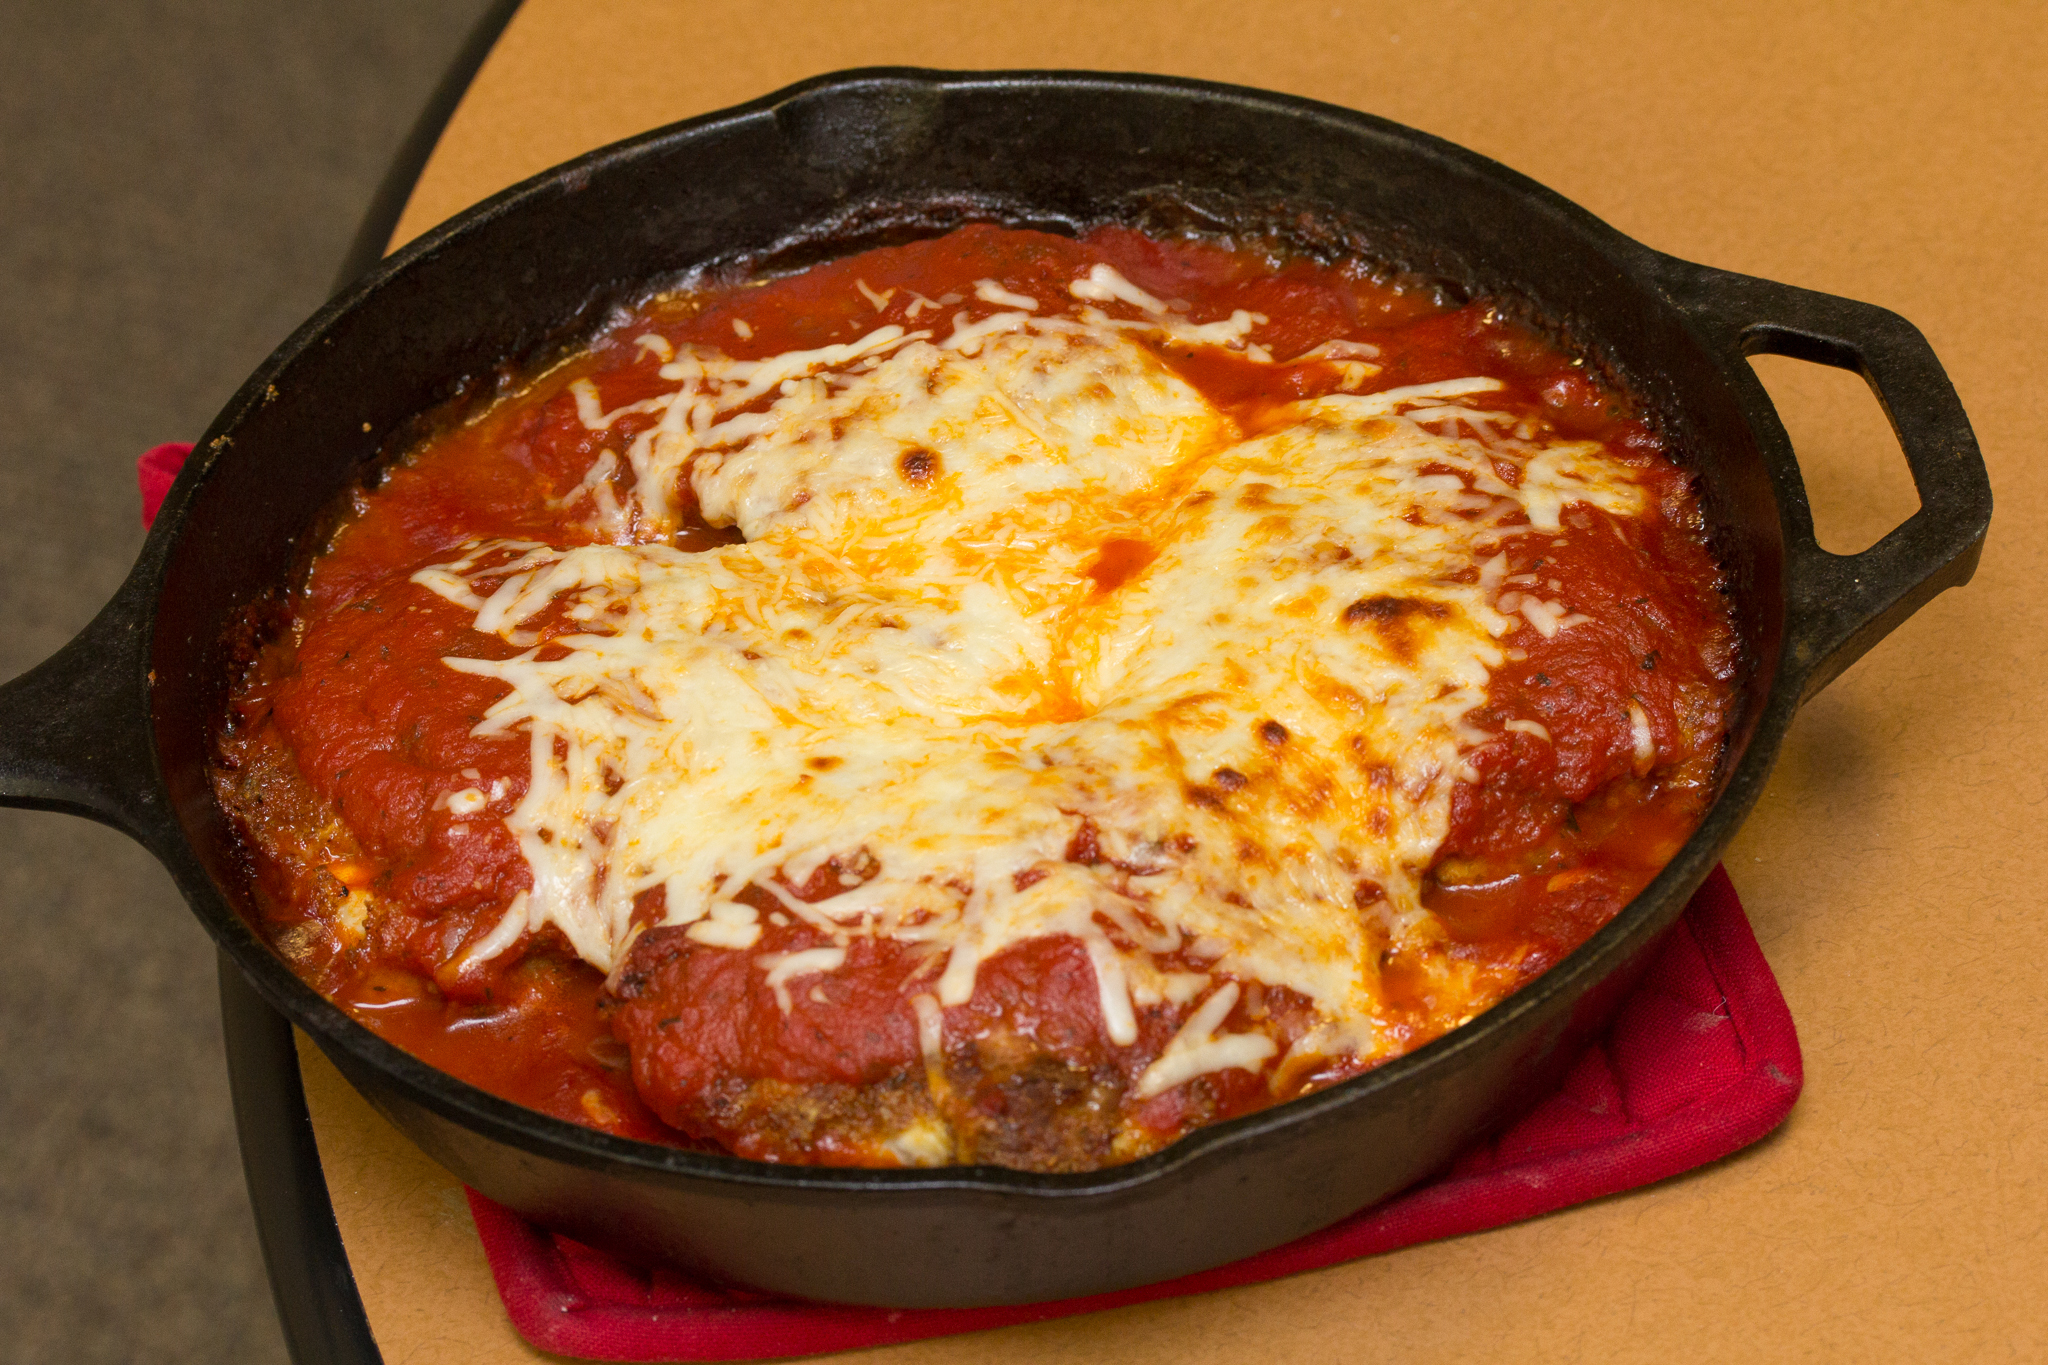
Taiwanese beef noodle soup is perhaps what I’d call the asian chicken noodle soup. I was always fed the soup as a special treat when I was young, with the special instructions to “finish the broth since it’s been stewed for hours”. It’s made hundreds of different ways with different spices and seasonings but the familiar scent of star anise and Chinese 5 space is prominent in every bowl served.

_MG_6110

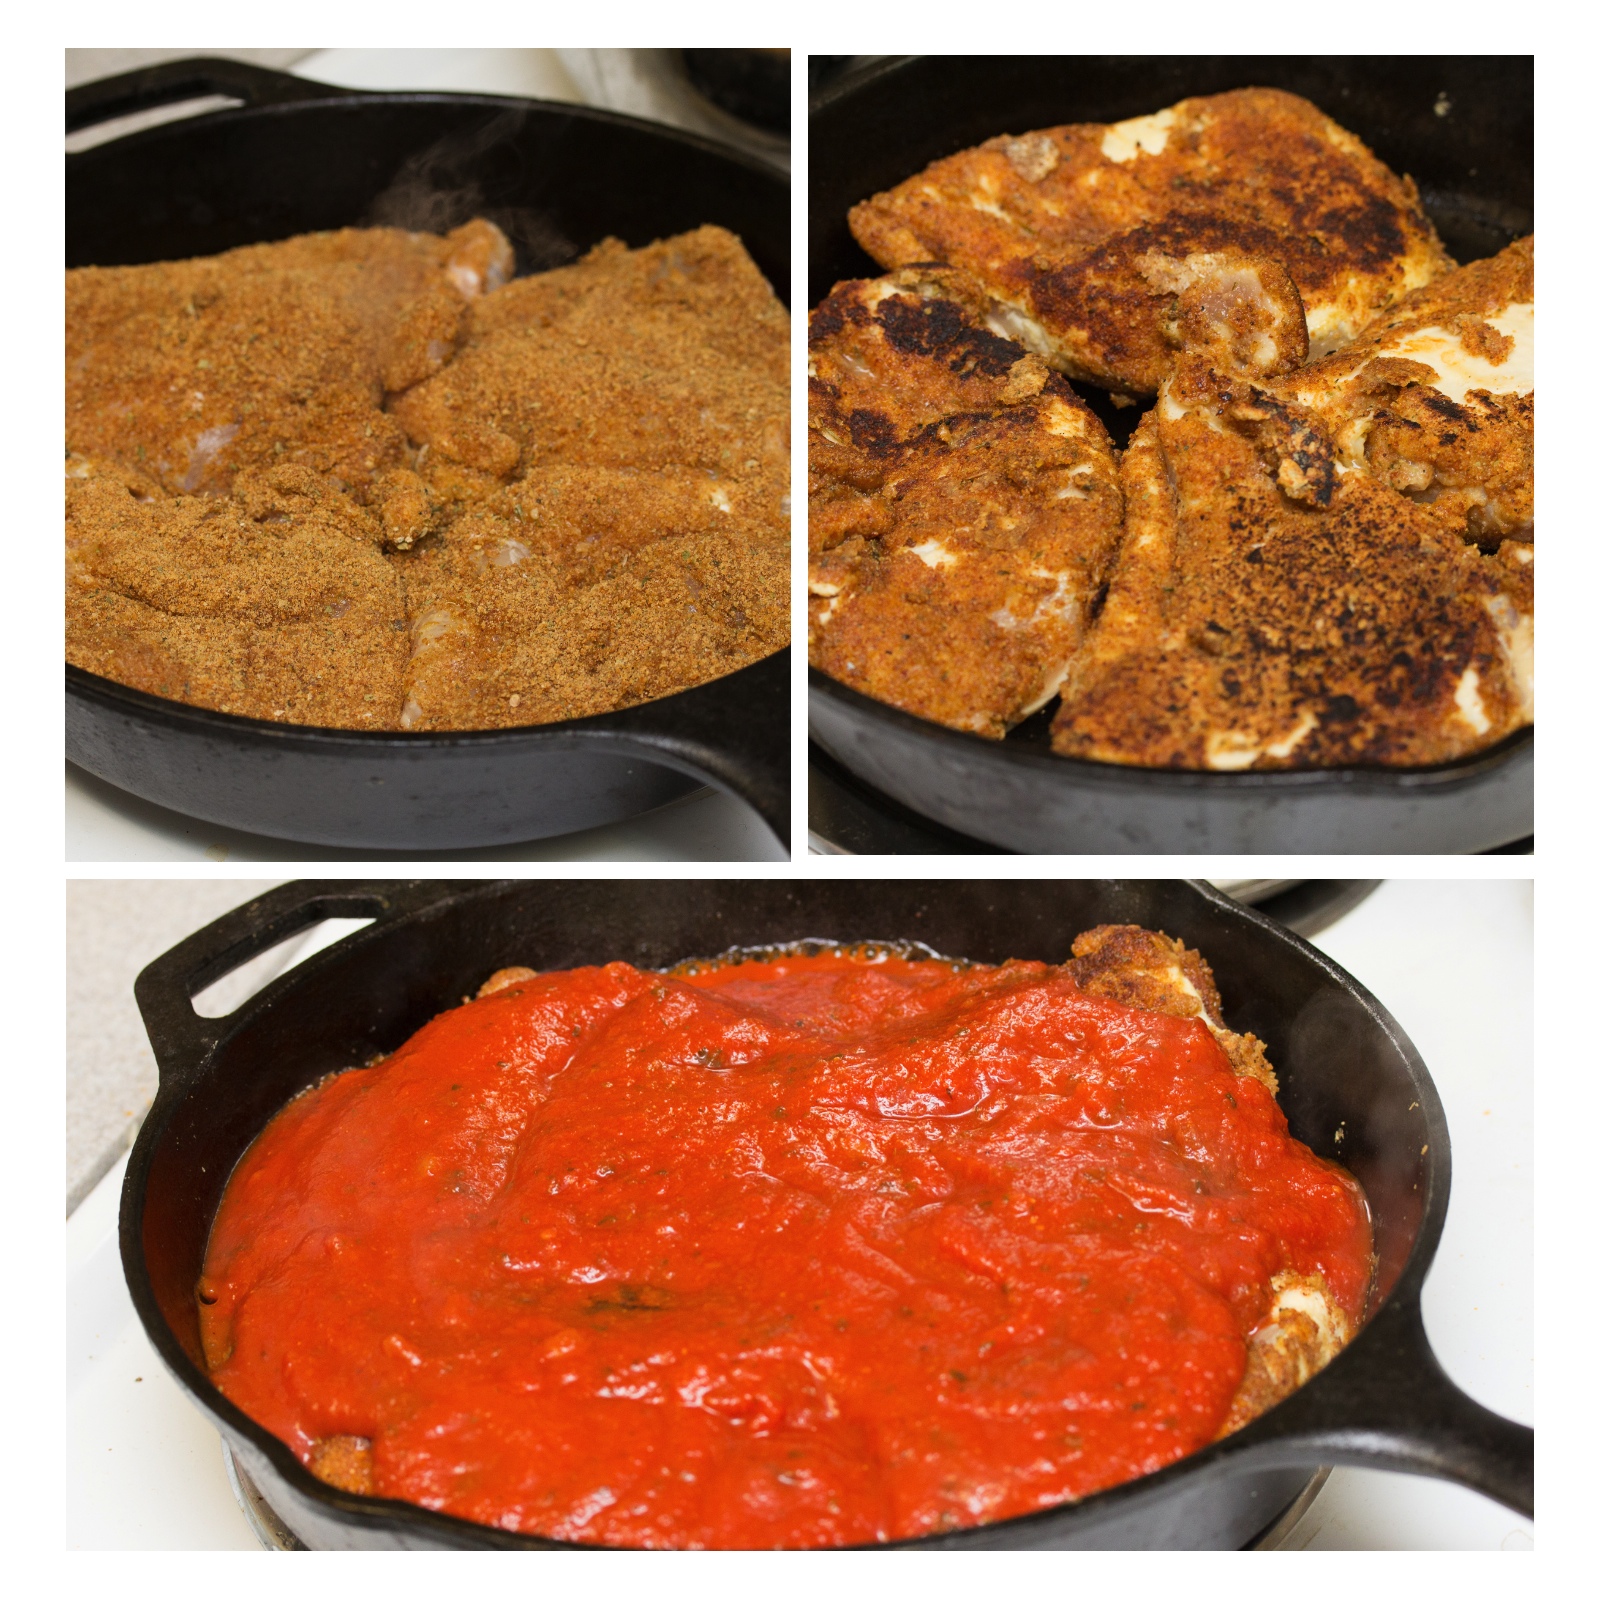
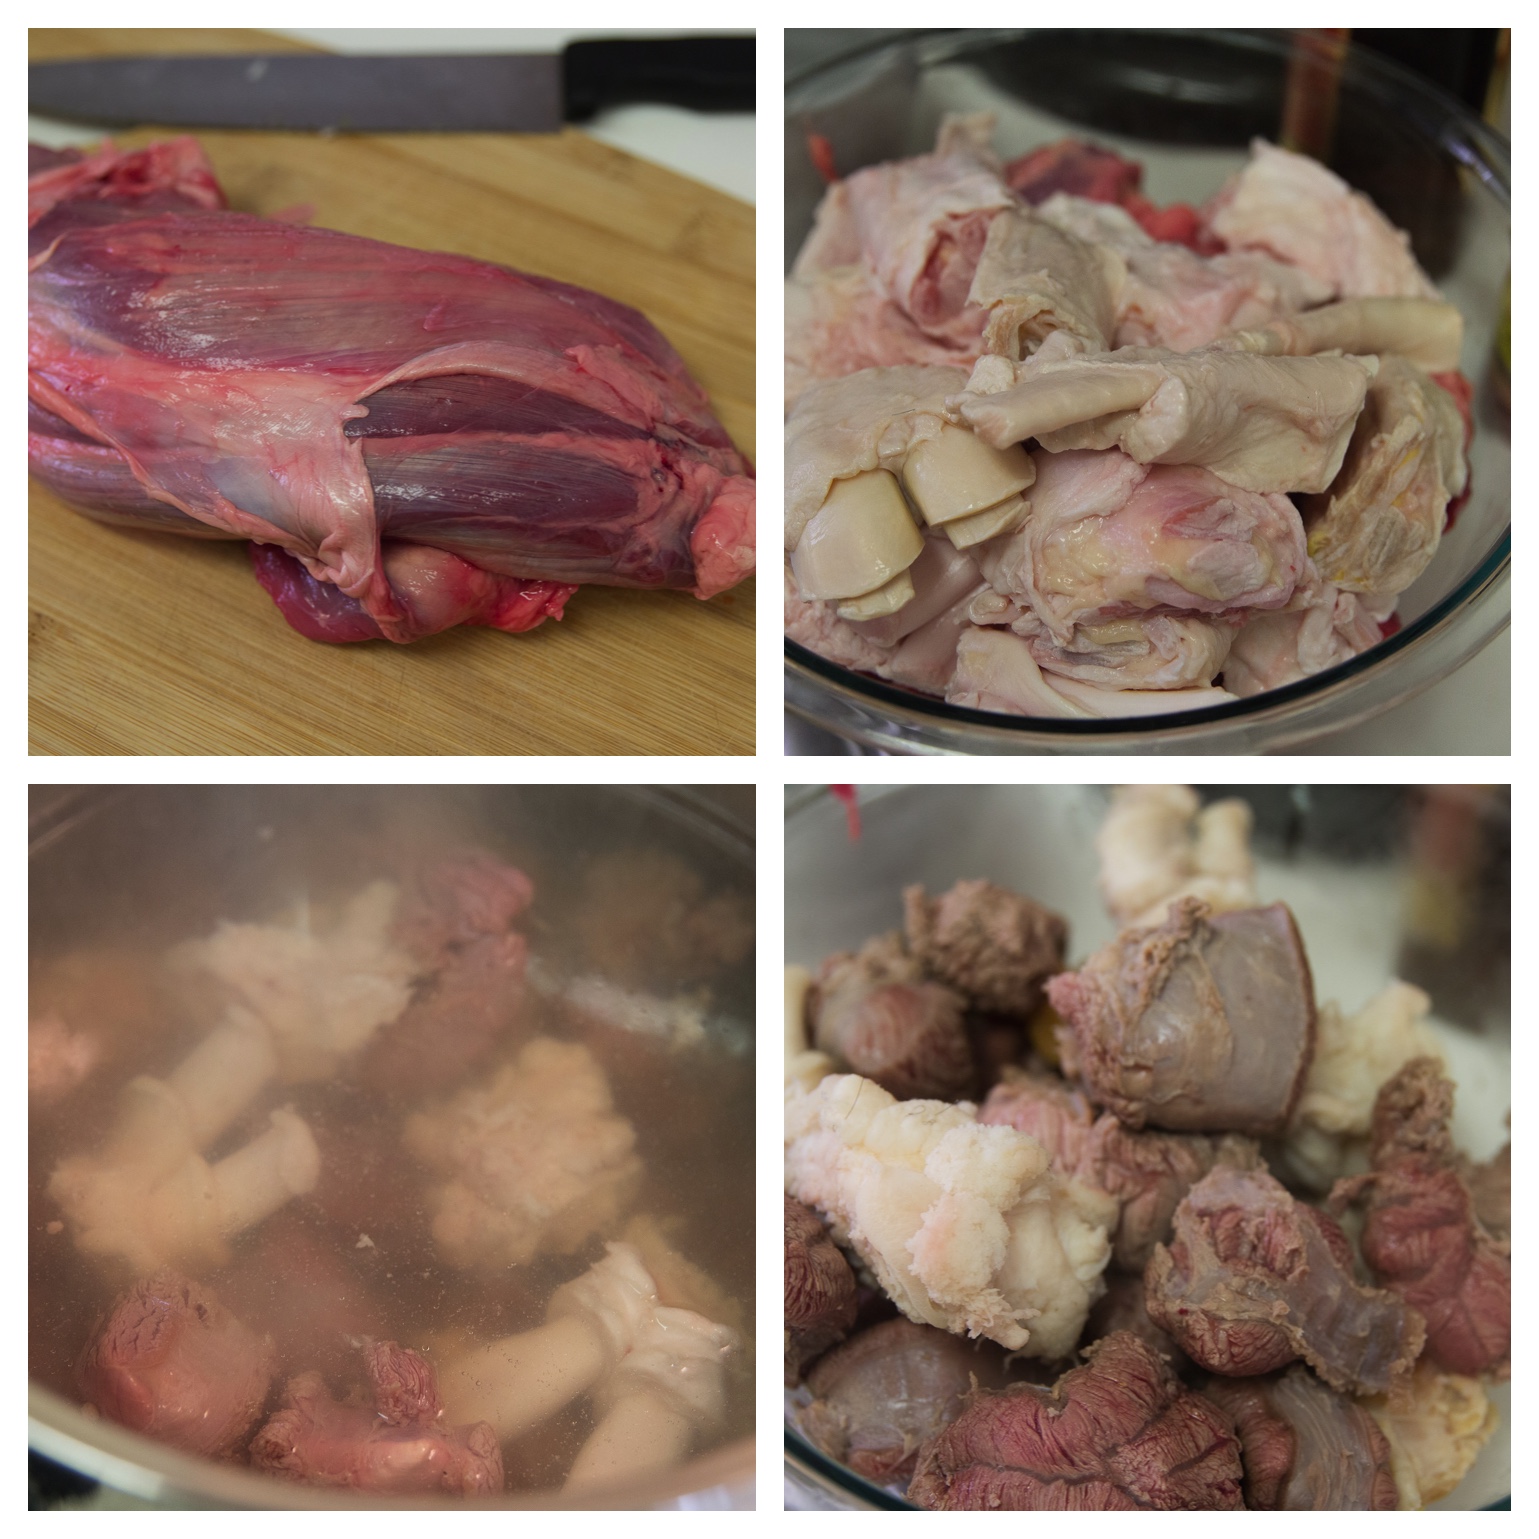
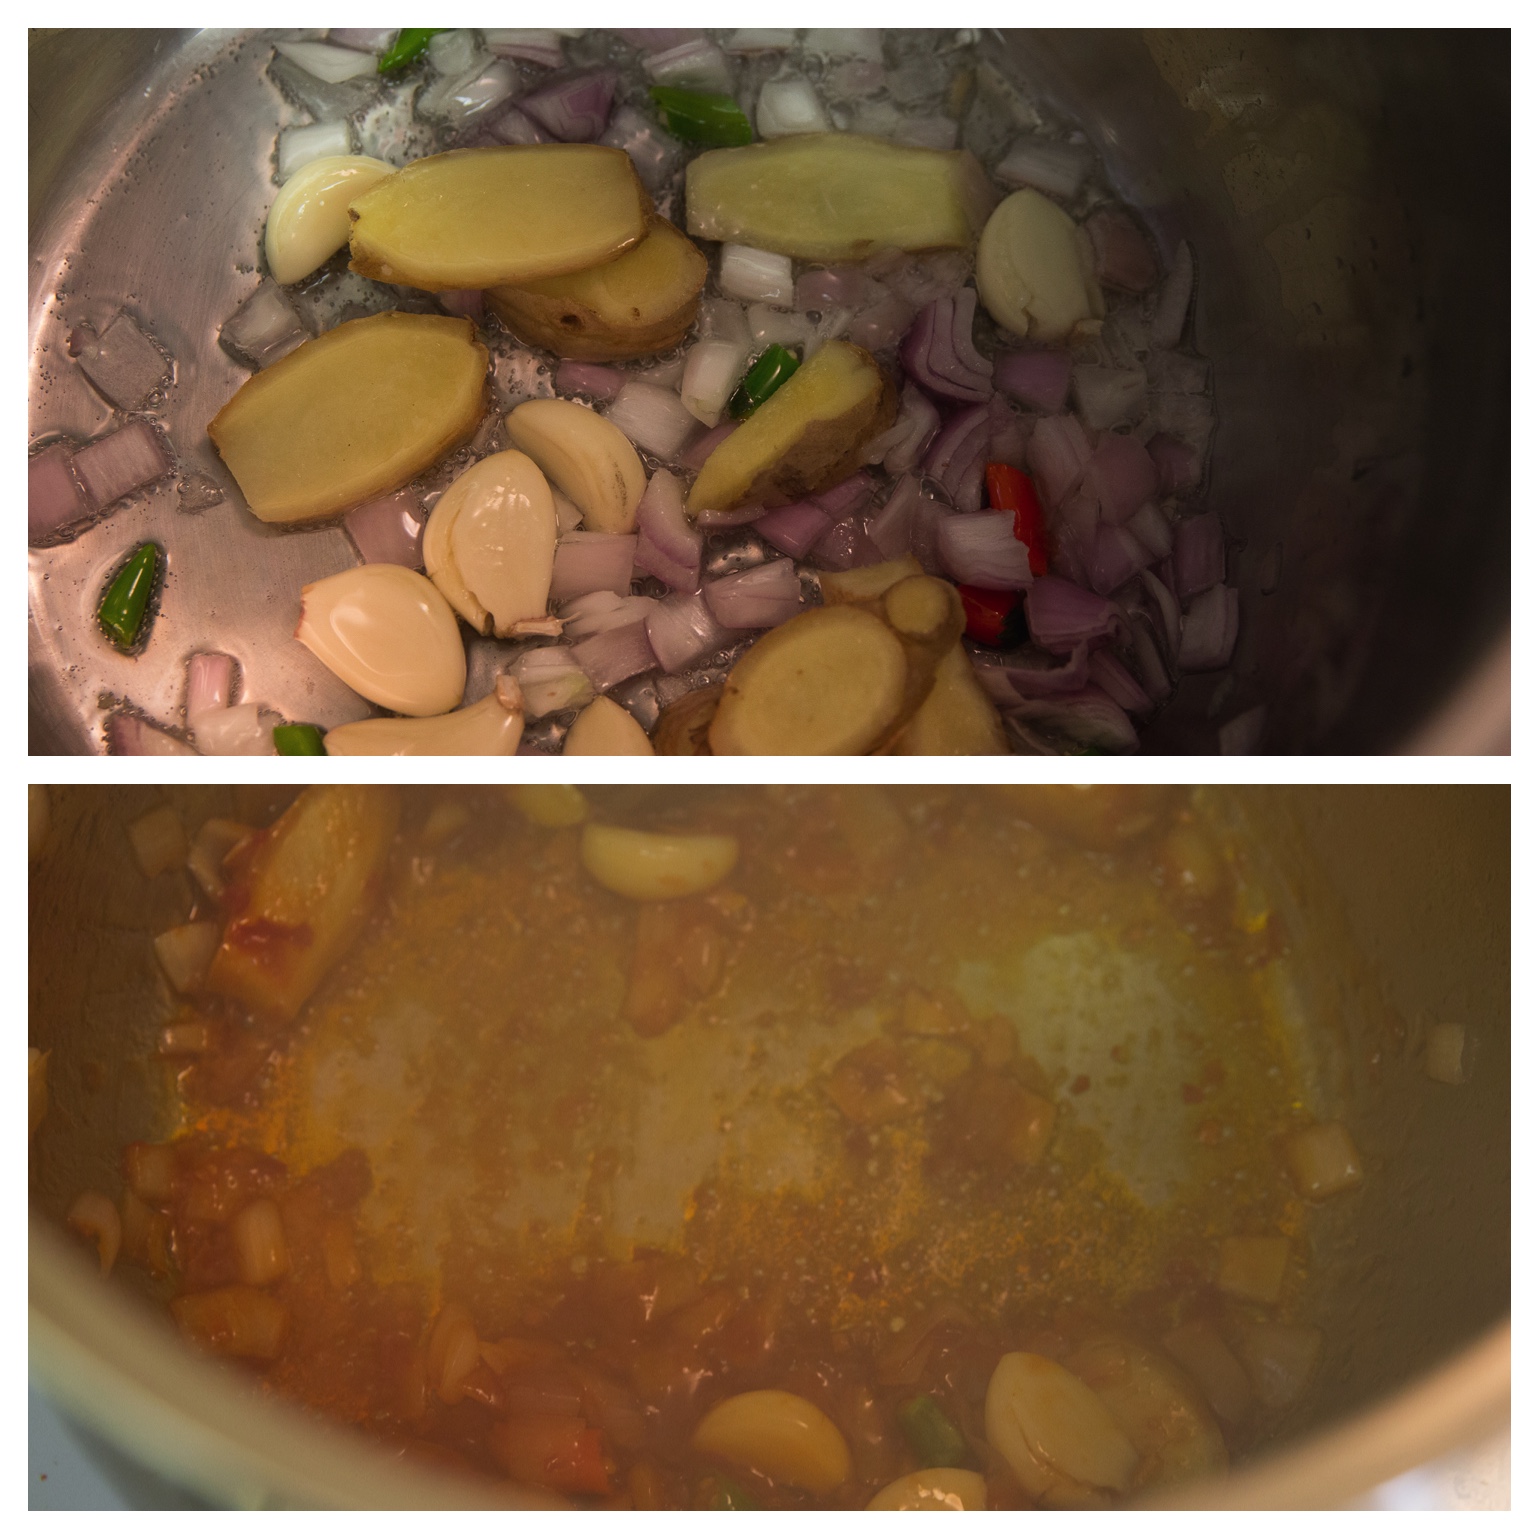
Surprisingly, it really wasn’t that difficult. The soup starts with the meat in a quick boil to remove any impurities. The fresh seasonings such as chills, garlic, and ginger are quickly fried to enhance aromas before the blanched beef, soy sauce and lots of water join the mix. From this point forward, the soup is stewed for hours until the tendon is thoroughly cooked, anywhere from 2 hours to 5 hours.

Untitled2

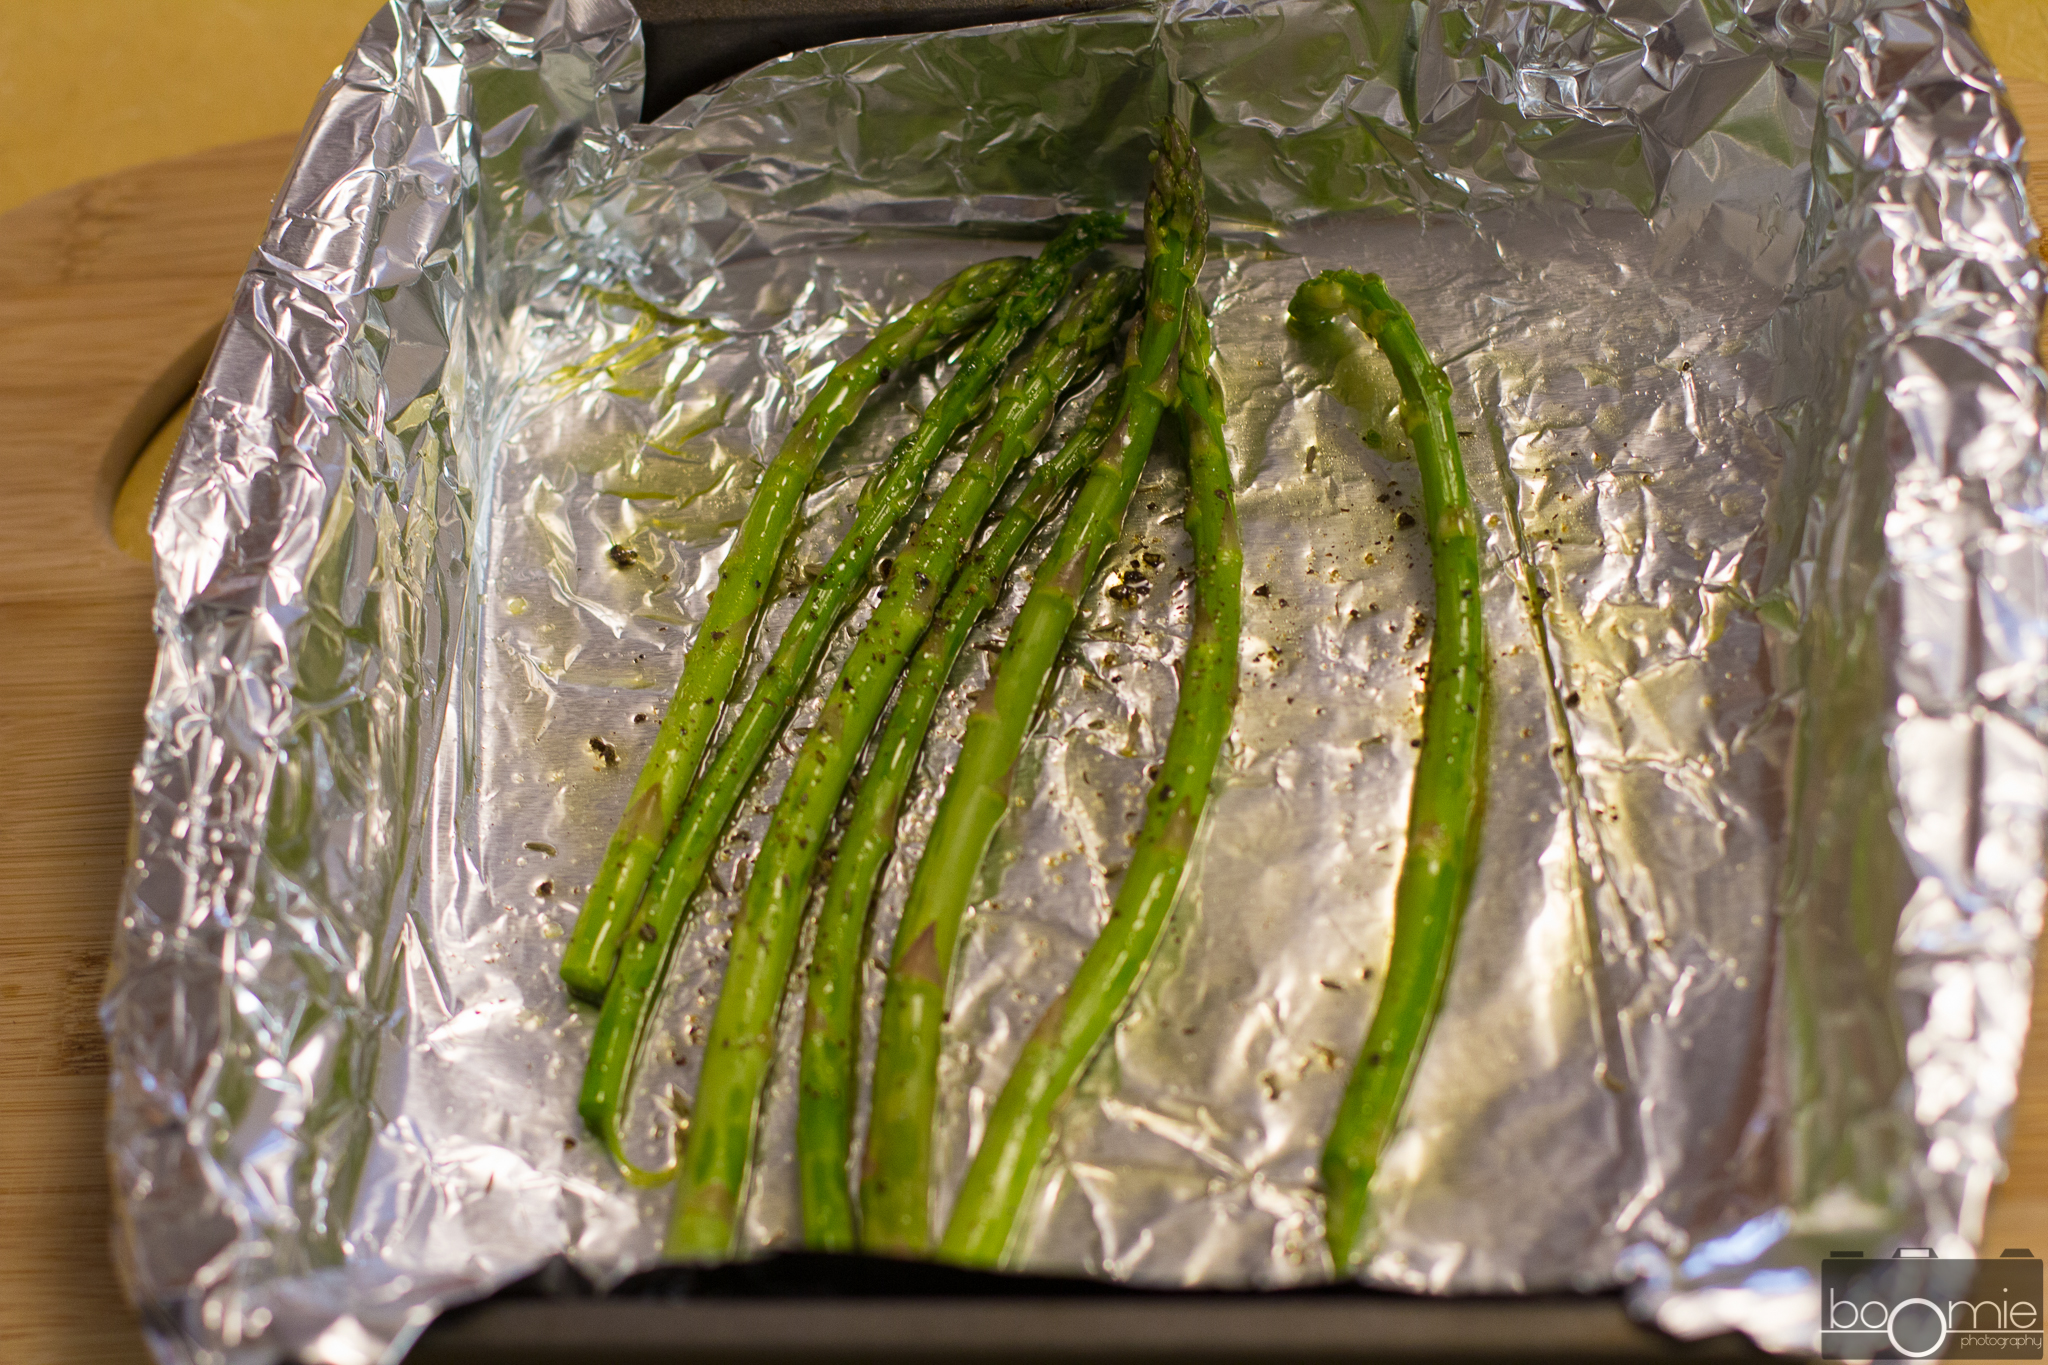
If you’ve never had beef noodle soup before but feeling adventurous I’d definitely suggest jumping into it whole. Especially the tendons. This recipe, however, can be easily manipulated to remove the tendon and utilize beef only. I personally love reheating the soup with tendon as the gelatin makes the soup firm up into a jello like form. This dish reheats really well. Whenever I want some the next day, I ladle in the cooled jello-like stock, chunks of meat and reheat until melted. I add any vegetables I have on hand to wilt in the pot while heating up some noodles on the side and in less than 15 minutes I have a delicious meal ready to eat. I also find that the flavors meld overnight in the refrigerator to create a fuller flavor as well.

Untitled4

Taiwanese Beef Noodle Soup

Ingredients

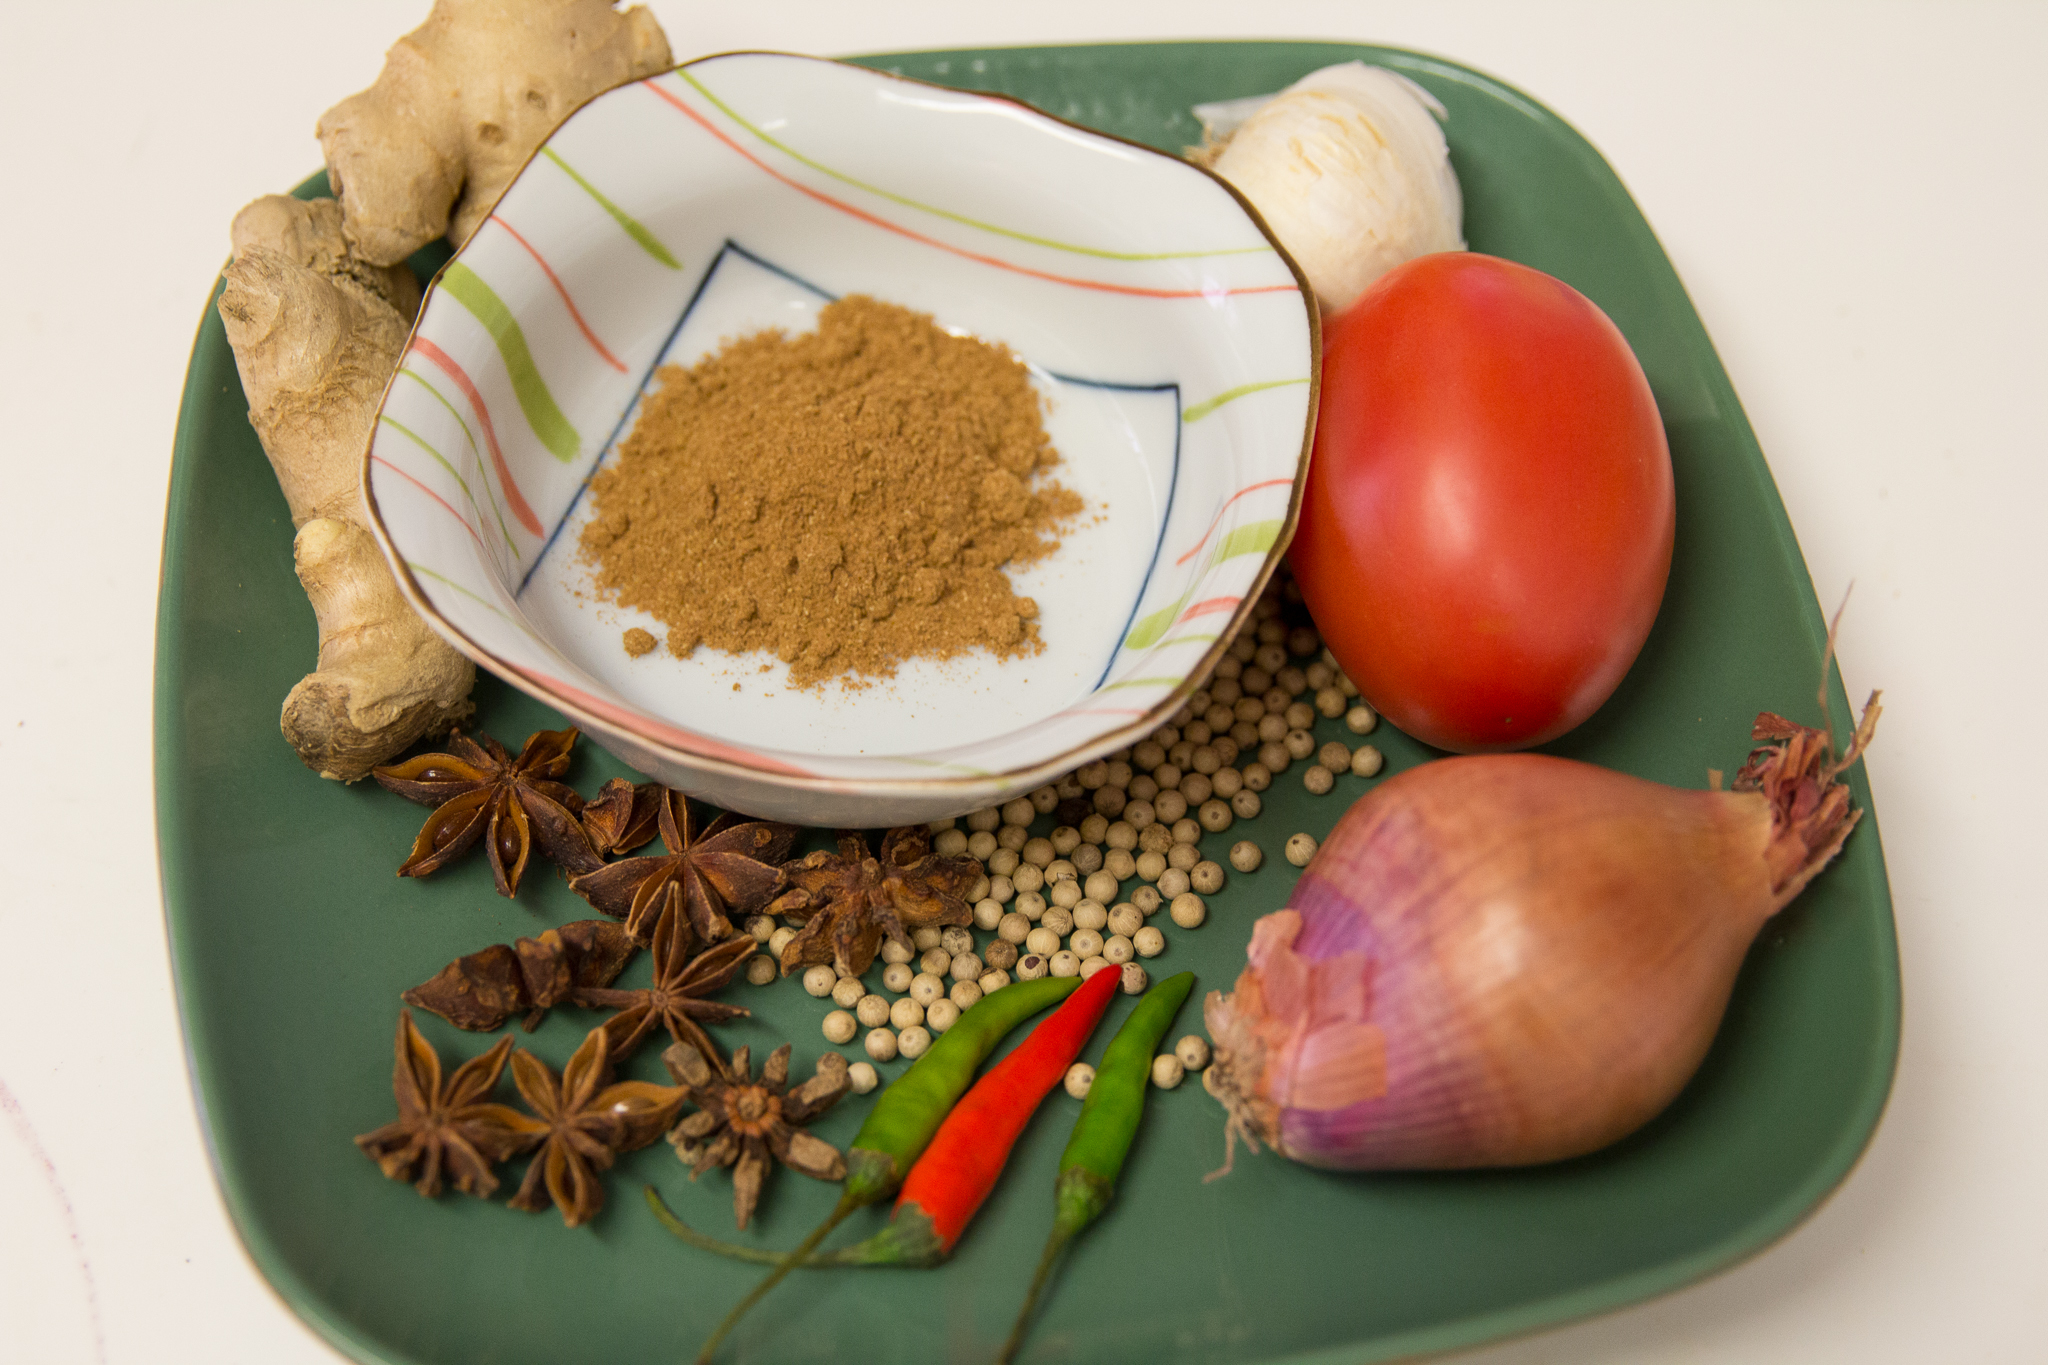
  • 4 pounds of a combination of boneless beef shank or chuck and beef tendon, cut into 1-inch cubes (I used 2 of each)
  • 3 tablespoons vegetable, canola, or peanut oil
  • 8 large slices fresh ginger root
  • 8 cloves garlic, smashed
  • 1 shallot, roughly chopped
  • 2-3 small red chilies, such as Thai chilies, roughly chopped
  • 1 large plum tomato, roughly chopped
  • 2 tablespoons sugar
  • 1 tsp 5 spice powder
  • 1 tablespoon Sichuan chili bean sauce (doubanjiang)
  • 1 cup Chinese rice wine
  • 1 tablespoon Sichuan peppercorns
  • 8 whole star anise cloves
  • 1/4 cup dark soy sauce
  • 1/2 cup light soy sauce
  •  4 quarts water
  • 2 pounds Asian wheat flour noodles (any width you like)
  • Fresh spinach leaves, baby bok choy, broccolini, or other small greens, as desired

Directions

  1. Place the beef in a large, heavy-bottomed pot or Dutch oven and cover with water. Bring the pot to a roaring boil and cook for a minute. Strain the meat into a separate bowl. Discard broth and impurities.
  2. Add the oil to the same pan and heat until shimmering. Add the sliced ginger, garlic cloves, shallot, and chilies. Cook, stirring, until fragrant, about 30 seconds. Add the chopped tomato and stir for another minute. Add the sugar and stir until dissolved, about 30 seconds. Add the chili bean sauce, and stir until the mixture just begins to bubble.
  3. Return the beef to the pot. Stir to warm up and coat the meat with the spices. Add the rice wine and cook for 1 minute, scraping up browned bits from bottom of pot. Add the Sichuan peppercorns, star anise, dark soy sauce, light soy sauce, and the water. Bring to a boil. Then reduce heat to a simmer and cover. Cook until beef is tender, about 2 1/2 hours.
  4. Using tongs, carefully remove the beef cubes from the stew and set aside in a bowl. Carefully strain the soup over a colander or mesh strainer to catch the ginger, peppercorns, and other stray solids. Retain any solids or small beef pieces from the strained mixture that you may want to keep, and return to the soup. Return the beef to the soup and add greens to wilt if desired.
  5. Cook the noodles according to the directions on their package. Strain noodles, and divide into serving bowls. Ladle the warm soup and beef chunks into each bowl and serve immediately.

_MG_6129

Flood Frosting Sugar Cookies

Day 3 of the Holiday Sugar Cookie Series

_MG_1340

I’m going to preface today’s post, a happy conclusion to the Holiday Sugar Cookie Series, by saying that it would not have been possible for me to even attempt any of this without Ree’s inspiration and the amazing cookies over at the Sweet Adventures of Sugarbelle. So I’m going to to say this now — check out their blogs!! I mean seriously they are inspirational._MG_1258

There isn’t any recipes involved with today’s post, just some ideas. To help you slackers that haven’t made your cookies yet, here are a few tips for the cookie baking process.

As far as your equipment is concerned, this is what I used. A lot of these things I had laying around or could be repurposed — although I did use this as an excuse to buy more tips, couplers, and some squeeze bottles.

Now I know some of you have been following since day 1. So gather your cut-out sugar cookies, and get the following set up. Everyone else, come back a day after you’ve made your cookies and right after you’ve made your royal frosting. Or keep reading for the fun of it.

_MG_1262

Start by arranging all of your equipment. Line cups with paper towels, fit couplers to piping bags, and arrange pipping bags so that they are inverted into cups and are held up.

Outline icing

_MG_1256

Start by filling a two-cup measuring cup with some of your fresh royal frosting. Add the color of your desire, and mix. If you’re using a mister, mist two or three times, otherwise add around 1/2 tsp to 1 tsp of water to the icing and mix to combine. Repeat this process until your frosting is like toothpaste.

_MG_1251

Do not get impatient and add more motor or else your icing will fall apart. Once it reaches the toothpaste consistency, take about 1/2 cup to a 3/4 cup of icing out and add it to a pipping bag. Tie with a pipping bag tie or rubber band.

_MG_1265

Flood Icing

_MG_1252

Continuing in the same mixing cup, continue to thin out the icing using 2-3 mists at a time (no more than 1 tsp) of water until it reaches the thickness of shower gel. If you draw a ribbon, it should be able to fall back onto itself in two seconds. Take this, and fill it into your squeeze bottles for easy squeezing. This should be thinner, but not thin enough to the point where it will just ooze all over the cookie.

Decorating Time

_MG_1268

Now its time for the fun part. Outline your cookies with your outline frosting and let it set for a few minutes, until they are just sett. Then, fill your cooking with your flood icing. Don’t worry about reaching all the edges. When you have most of the center filled, use a toothpick to help you along.

_MG_1269

You’re done!

Yay! Flood-icing sugar cookies, with just a little patience and a little more practice, can produce stunning results that really is a lot more effortless than they may appear. To get you started with a few cookie ideas, I’m sharing two of my designs with you. As I mentioned in my cut-out sugar cookie post, these cookies started out as party favors. I wanted to make snow-globe-like cookies, one more fitting for Christmas, and the other for the new year.

Untitled

_MG_1271

For the Christmas snow globe cookie, I made my cut-outs utilizing a round cookie cutter. When the cookies came out of the oven, I gently outlined a Christmas tree onto the cookie using a tree shaped cookie cutter. When the cookie cooled down, I simply traced with my outline frosting and then filled with my flood frosting. I then used some red filling frosting and dropped droplets into the tree to create some ornaments. When my tree was set and done, I outlined the entire snow globe using a white outline icing. It was then filled with white and embroidered with blue droplets to act as glitter.

Untitled

I then proceeded to made a new year cookie by filling a cookie completely using grey and decorated it with the same blue droplets as the christmas tree snow globe. Once those were completely set (I did this the next day), I traced the numbers 2013 onto the cookie using a food coloring marker and then traced that writing using an outline frosting. This was then filled using a different color to create a foreground/background effect.

Untitled

_MG_1335

Royal Frosting

Day 2 of the Holiday Sugar Cookie Series

_MG_1247

Believe it or not, royal frosting is the same frosting thats used to glue gingerbread houses together and decorate flood frosting cookies. For those of you unfamiliar with what flood frosting cookies are, flood frosting is the technique used to create smooth and matte finishes like the Starbucks holiday cookies.

For those of you who’ve decorated royal frosting, you also know that its a stiff mess, that dries in about 30 seconds. The trick is to work backwards from frosting to icing. This approach is great because you can make a stiff frosting thats excellent for gingerbread houses but can also be thinned to flood sugar cookies.

_MG_1240

There are countless royal frosting recipes that could work. I chose to work with meringue powder instead of real egg whites because I expected my cookies to sit in room temperature for a few days and I wanted to be sure no one got sick.

_MG_1241

Since you will be working with egg whites (in a powdered, meringue form),  make sure that all of your equipment is clean and oil free or frosting might not come together otherwise. Keep this in mind when you choose a flavoring or extract to work with because you’ll be adding it to your frosting.  I worked with Wilton’s clear vanilla flavoring to prevent any discoloration.

_MG_1242

After all the ingredients are gathered, all you need to do is combine the dry ingredients in the bowl of your stand mixer, combine the wet ingredients in a separate cup, and then join the two together. At this point the frosting is thin, very thing. A few minutes on medium high, the frosting becomes stiff, fluffy and ready to be used on whatever you may desire. This year I decorated some gingerbread houses with my friends Megan and Katie!

_MG_1243

I’ll be sharing techniques on thinning the frosting out tomorrow. If you end up making this frosting today, the frosting lasts up to a month after its made.  Just store it in your fridge with a wet towel over the bowl to prevent it from drying and a quick whisk with the whisk attachment will freshen it right up.

_MG_1244

Frosting tip: A good thing to keep by hand when working with royal frosting is a water spray bottle. I like to gently mist the surface of the frosting to prevent it from drying out, especially when I plan on thinning it out later anyways.

_MG_1248

Royal Frosting

Originally From: Sweet Adventures of Sugarbelle

Ingredients

  • 2 pounds of confectioner’s sugar
  • 1/3 cup meringue powder
  • 3/4 cup warm water
  • 1 Tbsp oil-free extract or flavoring

Directions

  1. In the bowl of your stand mixer, combine the confectioner’s sugar, meringue powder by hand using the whisk attachment.
  2. Combine the flavoring with the warm water and add slowly to the dry ingredients while mixing very slowly (stir or 2).
  3. When the water is completely added in, increase the speed of your stand mixer to medium high (6 or 8 on a Kitchen aid) and mix until fluffy. Stop as soon as it reaches stiff peaks as over mixing will cause your frosting to break down.

Cut-out Sugar cookies

Day 1 of the Holiday Sugar Cookie Series

6

Every year for christmas, my friends and I get together for a secret santa. Every year, I want to decorate sugar cookies for the first time, but I never really knew how. It all came together when I became the host of the exchange last year. It didn’t help that Ree over at the Pioneer Woman hosted this amazing looking cookie decorating session. I was sold.

5

It took some research and some more research. Crafty ideas don’t come very naturally to me and decorating cookies definitely errs on the side of the artistic side of cooking but Ree’s pictures had me sold. These cookies were decorated with a flood frosting. I referenced Sweet Adventures of Sugarbelle a lot throughout my decorating process and she has some amazing cookies so I definitely recommend checking her site out.

1

2

I’m starting this series with a sugar cookie, followed by a royal frosting then ending with some tips and techniques that I picked up throughout this process. I did, however want to get you started on the right foot — according to Sugarbelle, flood frosting sugar cookies work the best when you make the cookies a day ahead. This gives them a chance to dry out just a tad bit and let the oils reabsorb into the cookies. Go ahead and make these cookies tonight or tomorrow, then you’ll get a chance to make the frosting and follow along my posts throughout the next few days!

3

These sugar cookies don’t deviate too far away from your regular sugar cookie recipe. They involve creaming together butter and confectioner’s sugar, adding an egg and a flavoring, then finishing off with flour, salt, and baking powder. I personally love the flavor of vanilla so thats what I went with but the original author proposed almond extract. One nifty trick is the use of confectioner’s sugar for dusting a work surface instead of flour, which really preventing my cookies from becoming over worked.

4

Cut-out Sugar Cookies

Originally from: Sweet Adventures of Sugarbelle

Ingredients

  • 2 sticks of unsalted butter
  • 1 1/2 cups confectioner’s sugar
  • 1 egg
  • 2-3 tsp flavoring (I used vanilla)
  • 2 1/2-2 3/4 cups all-purpose flour
  • 2 tsp baking powder
  • 1 ts. salt

Directions

  1. Cream together softened butter and confectioner’s sugar. Add the egg and flavoring. Mix until well combined
  2. Add 2 1/2 cups flour, baking powder, and salt to the mixture. If the dough is no longer sticky and can come together as a ball then it is ready. If it is still too sticky, add another 1/4 cup of flour.
  3. Roll out on parchment to about 1/4 an inch thick, use confectioner’s sugar for dusting as necessary. Then, cut and bake at 400 degrees for 7-8 minutes.

7

Macaron Framboise (Raspberry)

_MG_3410

It’s been a while since I’ve really gotten a chance to cook anything for myself, let alone photograph and prepare a post for all of you. I personally wanted to say a special thank you to everyone who’s been following along throughout the past couple of months–seeing the statistics on my dashboard really became one of the highlights of this hectic quarter.

_MG_3409

As I’m working my way through senior year, a few things have changed in the past couple of months. First off, I’m finally affiliated (sort of)! I’m currently pledging to become a member of the Beta Theta Pi Fraternity and my friends have definitely joined the bandwagon of excitement. Thanks JenaLyn for the awesome Secret Santa gift… this was definitely (and very carefully) used in the making of these macarons 🙂

_MG_3479

In addition, I’m starting my grad school search for a student affairs program. Even though  I managed to finish all of my finals this quarter on Monday of finals week, it really wasn’t much of a break time for me, but more so a time to work on letter of recommendations. But of course, kitchen duty called and I took it upon myself to feed everyone around me.

1

I think one of the biggest inspiration for these macarons was my newest addition to the lens family, a 24-70mm f/2.8. I knew I wanted to highlight a pretty color– something that was fun. Raspberry jumped at me. I was lucky to have two excellent l helpers,  Katie and Megan, help out with my baking the past week. Unfortunately Katie had a final the next day this was being made, she definitely got to reap the benefits of my baking spree though.

23

What really makes the raspberry flavor jump out at you is the fresh raspberry jam that is really irreplaceable to this recipe. Although you could probably substitute the filling with a store bought jam, I’d encourage using a fresh batch. It was definitely an experience for me and to quote Megan: “it really wasn’t that hard!!”

4

Raspberries are first macerated with a masher over medium heat. Sugar, first whisked with pectin, then joins the mix with some lemon juice. Everything bubbles away for two minutes before its allowed to cool in a bowl covered with saran wrap pressed against the surface. Doing this, prevents a film from forming on top, yuck.

5

Everything else is relatively standard to the Pierre Herme Macaron recipe. Feel free to reference the pistachio flavor if you’d like! I’ve had some success substitute the raspberries with other fruits such as cherries, blueberries, and mangos. Can’t wait to share some other winter-y treats with you in the next few weeks. I have a sugar cookie decorating series I can’t wait to show you!

_MG_3406

Macaron Framboise

Raspberry Jam originally on: Not so Humble Pie

Ingredients

Filling

  • 225g (1 cup + 2 tbsp) granulated sugar
  • 2 tsp powdered pectin
  • 375g (3 cups) french raspberries
  • 1/2 lemon

Macaron shells

  • 300g ground almonds (ground to a powder)
  • 300g powdered sugar
  • 110g aged egg whites
  • 4.5g pink, fuchsia, orr rose  food coloring
  • 300g granulated sugar
  • 75g mineral water
  • 110g aged egg whites

Directions

  1. Start by making the jam. In a medium sauce pan, macerate raspberries with a potato mashers. Alternatively, process in a food processor or blend in a blender and then heat up over medium heat. In a separate bowl, whisk together sugar and pectin and then add it to the raspberries. Squeeze in some lemon juice for some tang and then allow to boil for two minutes. Strain the seeds out if desire, and then allow to cool in a bowl with plastic wrap pressed against the surface of the bowl until cooled
  2. Process powdered sugar and ground almonds in a stand mixer and sift into a large bowl. Combine the other 110 g of egg whites with the food coloring and add to the sifted almond flour and powdered sugar.
  3. In a sauce pan, combine water and sugar and bring it to a boil. In a stand mixer, start beating your egg whites on low speed. When your syrup reaches 115 C, turn the mixer to medium (6 on a kitchen aid) and whisk. When your syrup reaches 118 C, remove from heat immediately, increase the speed to medium high (or 8) and pour the syrup down the side of your mixing bowl bowl. Keep whisking until your mixing bowl is warm to touch (50 C).
  4. Pour the merengue over the mixture from step 2. Fold gently.
  5. Pipe circles of macaron batter out on parchment paper 3/4 of an inch apart. Rap baking sheets against counter, rotate by 90 degrees and wrap again.
  6. Preheat your oven to 325 C and let the macarons rest on the counter for at least 30 minutes. Bake in the preheated oven for 15 minutes, opening the oven door quickly twice throughout. At the end of the 15 minutes, remove from oven and check for doneness. If the macaron needs more time, bake for another 2 minutes and remove.
  7. Cool on wired rack and fill when completely cooled.

_MG_3404

_MG_3415

Almond Butter and Jelly Muffins

_MG_1374

I’m finally on Pinterest! I finally decided on a new way of organizing my recipes and ideas for recipes. I though it would be the most appropriate to do this on Pinterest so all of you can join along!

1

To celebrate this new beginning, I decided to share a recipe I discovered yesterday evening. It was around 9 PM and I had to stop myself from going to the kitchen when I stumbled upon this. It doesn’t help that I live with hungry college students. Or that I’m a hungry college student.

2

Most of you probably have everything you need to make this. I give you permission to go check. Go now. I’ll be here. You need almond butter, brown sugar, eggs, milk, oil, vanilla extract, flour, baking powder, and jam. Back? Ok, lets move on.

_MG_1345

Making this is even easier. You combine everything in a large bowl, sandwich some jam between batter in a muffin tin, bake it for 20 minutes and be prepared to serve a delicious breakfast the next morning (if they even last that long). The original recipe used peanut butter which probably makes a little more sense for most people but I love my almond butter. Feel free to experiment with your own combinations because this recipe is pretty flexible!

_MG_1332

A few weekends ago, my friends and I went strawberry picking at a local U-Pick strawberry farm. Since they were relatively post-season, I decided to make my own strawberry jam. They ended up perfect in these muffins.

photo

Almond Butter and Jelly Muffins

Adapted from two peas & their pod, seen on Food Librarian

Ingredients

  • 1 cup creamy almond butter
  • 1 cup brown sugar
  • 2/3 cup canola oil
  • 2 eggs
  • 1 1/2 cups milk
  • 1 Tbsp vanilla extract
  • 3 1/3 cup all-purpose flour
  • 2 Tbsp baking powder
  • 1 cup of your favorite jam

Directions

  1. Preheat oven to 350 F.
  2. In a large mixing bowl, whisk together almond butter, brown sugar, canola oil, eggs, milk, and vanilla extract. Add in flour, and baking powder and whisk gently until just combined.
  3. In a greased (or lined) muffin tin, add 2 Tbsp of batter. Add a heaping teaspoon of jam. Cover with another 2 Tbsp of muffin batter or until approximately 3/4 filled.
  4. Bake for 20-25 minutes or until just set and the muffin bounces back lightly when you touch the top._MG_1366

Chicken Parmesan

_MG_2478

A lot of people have a recipe they keep up their sleeves. Its typically a casserole or a meatloaf… something they can just throw together quickly on a weeknight without thinking. I never really knew I had one until I decided to make a chicken parmesan. To be fair, I didn’t really decide that I wanted to make chicken parmesan. In fact the conversation with my best friend went something along the lines of this.

Me: “I really want eggplant parmesan. Too bad theres no eggplant…”

Jerry: “Don’t you have chicken…”

Me: “Thats not eggplant”

Jerry: “Its chicken… I love chicken”

4

And thus chicken parmesan was on the menu for dinner. In his defense, I didn’t really care what we ate for dinner. The whole concept of chicken parmesan just didn’t cross my mind, I just wanted something that I could throw together. That was what I received.

1

Chicken breasts are briefly tenderized with a cast iron skillet (or anything heavy really), that I later used to cook them in. They are then dredged in flour, eggs, and seasoned bread crumbs, After being briefly crusted in a pan, pasta sauce and cheese join the crowd and the whole pan is sent in a preheated oven to simmer into deliciousness.

2

If the cast iron skillet you’re working with isn’t thoroughly seasoned I highly recommend using a foil lined pan, an enamel dish or something that isn’t cast iron by itself. Chances are, iron could leech into the acidic tomato sauce and bad things could happen. I was lucky that the pan I was using has withheld some pretty serious beating–I was just too lazy to transfer the chicken to another dish.

3

Chicken Parmesan

Ingredients

  • 4 Chicken breasts
  • 1/2 cup flour
  • 1 egg, beaten
  • 1 cup bread crumbs
  • 1 tsp garlic powder
  • 1/2 tsp paprika
  • 1/2 tsp oregano
  • 1 can, your favorite pasta sauce
  • 1 cup shredded Mozzarella
  • Parmesan Cheese

Directions

  1. preheat oven to 350 F.
  2. Wrap chicken breasts gently in plastic wrap and beat the chicken until flattened, about 1/2 to 1/4 of an inch thick.
  3. Line three plates up. In the first plate, add flour with a dash of salt and pepper. On the second plate, add the beaten egg. On the third plate, add the bread crumbs, garlic powder, paprika, and oregano. Mix the spices to combine.
  4. Dredge the flattened chicken by coating it in flour, dipping it in the beaten egg, and then coating with the seasoned bread crumbs.
  5. In a large skillet, heat up 1 Tbsp of oil (I used olive oil) over medium high heat. Fry the dredged chicken for a few minutes until golden brown. Flip and repeat.
  6. If you’re making this in a cast iron or enamel skillet, add the pasta sauce to the pan. If you are doing this in a separate baking dish, transfer the chicken to the baking dish and cover with the pasta sauce. Cover with the shredded mozzarella. Sprinkle parmesan over, lightly covering the mozzarella.
  7. Bake at 350 for 15 minutes or until a thermometer registers the chicken to have reached 165F. Serve with a side of pasta and a extra sprinkle of freshly grated parmesan.

_MG_2485

Magical Peach Cobbler

_MG_1317 copy_MG_1315

I’m not going to lie, I’m not the biggest fan of ambiguity. I like knowing things and I like details. This is true for use of broad words like “cobbler”, as well as uncertainty in recipes that are supposed to just work. I’m all about the nerdy science behind things – graphs, data and logic.

3

When I first came home with a box full of ripe and fragrant peaches, I knew I had to make a cobbler. Although the cobbler is inspired by the British, I resisted my urge to follow a food’s origin as I have with the macaron, and dug into the archives for a Southern recipe. I’ve had a peach cobbler recipe filed away for a while now, a recipe from Paula Deen.

5

I was a little intimidated by the process since I usually research my recipes. I look around to find my favorite aspects of each recipe and combine things into a consolidated recipe. This wasn’t the case with this cobbler. Some versions I came across relied on the use of pie crusts and puff pastries while other versions used cake mixes or biscuits. It was hard to find a recipe that was consistent on some level (other than the use of peaches). A uncomfortable feeling, part of me was too scared to experiment with something I wasn’t familiar with. Another part of me knew I had to keep true to Paula.

_MG_1289

Then, I questioned my decision. The recipe starts with cooking peaches down in some sugar. Butters is then melted in a pan in the oven. The “biscuit” batter is then poured over the melted butter. The assembly is completed with the peaches are gently placed on top and the syrup gently drizzled. No part of this made sense. This order is the exact opposite of the supposed finished product. The end result was a tender, cakey, biscuit covering warm, delicious peach slices. Somehow, a 35 minute trip in the oven, a dash of cinnamon, and a whole lot of will power from eating all the peaches (guilty!) created a delicious final product that magically reverses the layers I made and killed any doubt I had for the Queen of Southern Cuisine.

_MG_1294

For those of you who are stumbling onto this via a link, you can find out how to peel peaches from my post yesterday. To slice the peaches, hold it in your hand and run the knife down until you hit the pit. Move over to the right and run the knife down again until you hit the pit, this time pulling the knife in the direction of the cut you made earlier and pulling out with a gently flick so the fruit comes up with the knife. Repeat this for your peaches and again, resist the temptation to eat all the peaches. 12

I was able to put a few twists of my own on this recipe. Instead of letting the butter just melt, I let the butter brown slightly to add a nutty aroma. Instead of self-rising flour, I used regular flour, added baking powder and salt to make my own self-rising flour. Its important to note that the pan must be baked on a cookie sheet to prevent anything from burning. I also made sure to spoon in my peaches very gently before pouring the syrup on the pan even more gently to prevent any mixing between the batter and the syrup. Give this recipe a try. I had to try to preserve 2 extra servings before 5 people devoured the entire recipe!

_MG_1322

Magical Peach Cobbler

Adapted from Paula Deen

Ingredients

  • 4 cups peeled, sliced peaches (I used about 5)
  • 2 cups sugar, divided
  • 1/2 cup water
  • 1 stick butter
  • 1 1/2 cups flour
  • 2 1/2 tsp baking powder
  • 1/4 tsp salt
  • 1 1/2 cups milk
  • Ground cinnamon, optional

Directions

  1. Preheat oven to 350 ºF.
  2. Combine peaches, 1 cup sugar, and water in a saucepan. Mix gently and bring to a boil. Simmer peaches for 10 minutes and remove from heat.
  3. Melt butter in a 3-quart baking dish, or a 13 by 9 pan ad place in oven to melt until golden brown.
  4. Mixing remaining cup of sugar, flour, baking powder, salt and milk gently to prevent clumping. Pour mixture over melted butter and do not stir. Spoon fruit evenly over batter and gently pour syrup over. Sprinkle the top with ground cinnamon, if desired. Bake for 30-45 minutes or until the top is golden brown.
  5. Let cook for 10 minutes before serving. Serve with whipped cream, vanilla ice cream or by it self!

Peeling peaches in 2 minutes

peaches-Recovered

Yesterday my grandparents came to visit me. They insisted on taking me grocery shopping. As we walked into Costco, a whiff of aromatic peaches hit me as I walked pass the aisle of goods they place near the entrance. I pulled the cart and started going backwards, eyeing the delicious fruits and grabbed two cases. Although they weren’t the cheapest peaches, they proved to be one of the juiciest peaches I’ve ever tasted.

_MG_1249

When I went home, I knew I had to do something with these peaches except I didn’t know how to do anything with these peaches. I was feeling experimental since peaches weren’t something I enjoyed on a regular basis. I knew I had to try making something I’ve never made before. This ended up being peach cobbler.

My biggest problem: peeling the peaches. The peaches I had were ripe, soft, and juicy. There was no way I could take a fruit peeler without making a huge mess. I headed over to Our Best Bites, and thankfully Kate was able to give me some direction. Turns out her method works for basically any stone fruit including nectarines, peaches and even tomatoes. Thanks Kate!

_MG_1250

How is this done? Simply bring a pot of water to a boil. Score the peaches gently with an “X”. Drop the peaches in the water for 30-45 seconds, longer if the fruit is harder, or less ripe, and drop it in a ice bath. Once its cool enough for your to grab it, all you need to do is rub or peel the skin from the X you marked. The peaches were so easy to peel, the skin was coming off as I picked each one up.

_MG_1256

The end result? a perfectly peeled peach. I ended up having to eat a peach on the spot. I mean: I ended up  needing to test a peach to make sure they weren’t cooked by the water. (They weren’t).

_MG_1253

One-pan Eggs, Asparagus, and Smoked Salmon

_MG_1154

We all need a break. Sometimes its from school, sometimes its from work, sometimes its from making a nice breakfast. For me, this usually means a Quaker’s Real Medley oatmeal or a serving of greek yogurt with a banana. Although this combination sounds pretty healthy and decently tasty, it gets really old, really fast. So when I stumbled across this recipe at 1 in the morning the night before I had work the next, I jumped at it.

_MG_1138

Since its in the middle of summer, I’m temporarily staying at a different apartment on campus. I woke up around 8 AM the day-of, not knowing how long this process would actually take. I stumbled my way into the kitchen of my new apartment kitchen and started preheating my oven before I took a shower. After preparing myself for the day and getting the asparagus cleaned and ready, my oven was finally preheated. I always individually snap off the ends of my asparagus to ensure tender spears.

_MG_1140-v1140

The original recipe started with strips of bacon, removing the bacon to cook the asparagus in the rendered fat, and finishing with the eggs. I substituted this with olive oil which allows me to serve vegetarian portions and add smoked salmon to jazz up the dish for non-vegetarian portions. After a light coat in vegetable oil, a sprinkle in thyme, salt, and pepper, the spears were tenderized in the oven for around 6 minutes for my thinner spears.

_MG_1145

At the 6 minute mark, I removed the pan, cracked eggs on top and returned the dish to the oven to finish up while I started toasting a tortilla to serve along my soon-to-be breakfast. I prefer a cross between a semi-set and runny yolk so I pulled it out just before the 5 minute mark. The result was a tender yolk that was just slightly runny which I scooped up with my tortilla and smoked salmon.

_MG_1147

At around 8:45 I was done eating and ready to go to work, a full hour earlier than the time I usually leave my apartment. I ended up using this time to read from my new book gifted to me by my mentor titled “Leadership on the Line. here wasn’t even any dishes to wash since I was able to toss the foil that everything was prepared in. For those of you who need a simple something to start your day, definitely consider this recipe. Head over to Simple Bites to see how the recipe is prepared with bacon and give both a try. Add some variety to your breakfast menu, without any additional time!

One-pan Eggs, Asparagus, and Smoked Salmon

Adapted from Simple Bites

Ingredients

  • 2 eggs per person
  • 5-6 spears of asparagus per person (I definitely used more for myself…)
  • 1 oz of smoked salmon per person
  • pinch of salt, thyme pepper (and your other favorite herbs)

Directions

  1. Preheat oven to 450 F. While the oven preheats, wash asparagus thoroughly. Snap off the woody ends of the asparagus. For thicker spears, use a vegetable peeler to remove the bottom half of the peel.
  2. In a roasting pan, add 1 Tbsp of oil, Add asparagus to the pan and shake it around to coat the spears. Arrange in a single layer and sprinkle with salt, pepper, and other herbs if you’d like.
  3. Roast thicker asparagus spears for 8 minutes, and thinner spears for 6 minutes or until they soften. Remove pan from oven and gently crack eggs on top of the asparagus. Return the pan to the oven for 4 minutes for soft egg yolks, 5 minutes for medium cooked egg yolks and 6-7 minutes for firm egg yolks.
  4. Place strips of smoked salmon over the eggs and serve with toasted tortillas or bread.

_MG_1151