

Since my first recipe “attack” at French macarons earlier this year, I have tried many different ratios and recipes in search of the perfect macaron recipe. Turns out… this doesn’t exist. Making macarons is not all about proper technique or advanced equipment, although both can help you. Instead, environmental variables such as temperature and humidity come into play as well. I have, however, gotten pretty darn close to a recipe that can be pretty fail proof if you follow the guidelines given.

After coming home from college for winter break, today was the first time I finally got a chance to bond with my lovely little sister, Michelle.

She too enjoyed the cookies for their versatility and their ability to match her liking in terms of taste. Although these macarons are not perfect, the rest of my family (whom have never had macarons before) still fell in love with the unique, simple, elegance the cookies deliver.
In the past, I’ve had inconsistent results in removing the final macaron shell from the parchment paper. After much trial and error I’ve developed the following notes:
- Smaller macarons bake more easily, go for 1 to 1 and a half-inch
- Use an oven thermometer to ensure you are baking at the right temperature
- Use a kitchen scale for accurate measurements
- Don’t be afraid to experiment like I did, you might like your results better!
Today’s macarons were a result from a whim that Michelle and myself had in my relative’s house. Given those constraints, I wasn’t able to age the egg whites ahead of time and I did not have a stand mixer either. In fact, my relative’s house didn’t have a hand mixer so we had to settle with a good old whisk. They also didn’t have a sift so the ingredients were mostly unwhisked (which I’ll discuss later). After mixing the almond flour and confectioner’s sugar, I shook the bowl in a sifting motion so the bigger “clumps” would rise to the top and crushed them by hand. The ingredients for this recipe was based off of Tartelette’s standard macaron recipe with the addition of Cream of Tartar.
Let’s get started after the break
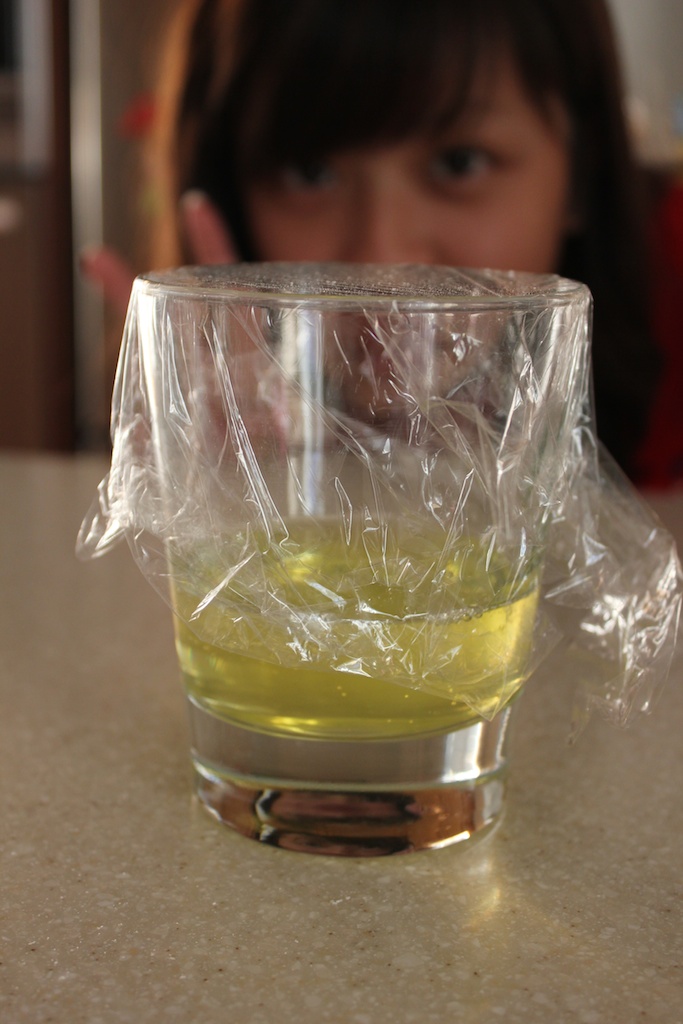
Instead of aging the egg whites as I normally would, I separated the egg whites into a glass covered with plastic wrap and let it sit at room temperature for two hours.

To make things a bit easier, I used my secret ingredient, cream of tartar. I gently beat the egg whites with a pinch of Cream of Tartar in a circular motion so the proteins in the egg white have a chance to unravel.


At this point, I added the sugar a little bit at a time. Because I was doing this by hand, I had Michelle help me sprinkle the sugar in as I beat the merengue. This was probably the worst part of the entire experience. By the time I had near-stiff peaks, my arms were exhausted. I ended up adding the dry ingredients in at this point instead of going for super stiff peaks. On a daily basis, go for a hand mixer or stand mixer if you have one and beat until you have stiff peaks!


Michelle giving whisking a try
Next I added the dry ingredients to the wet and started folding.

Here’s an example of what batter might look like after folding for a bit. Please note the thick and not smooth ribbon–this batter needs to be folded more.

This is what your final batter should look like. If you aren’t too sure, keep your batter on the thicker side because you can always get rid of sharp tops on a macaron.

Next came time to pipe the batter. My trick to pouring batter into the pipping bacg is using a tall cup. I lay a gallon ziplock bag or pipping back and fold it over the edges of the cup. I then add all the batter into the cup; I usually end up pretty successful…


Next, Michelle lined some baking sheets with parchment paper and tailored it so my macarons wouldn’t come out all curved.


When you are pipping, you want to stay stationary and squeeze, here are some examples.


This is what you don’t want to do. If you end up with funky textures, go ahead and gently press on the sharp peaks and ridges with a wet finger.
 I felt a few “chunks” struggling through my ziplock bag. For the most part these chunks fit through with a little squeeze towards the tip but they looked a bit odd on the cookies. When you are done, throw the baking sheets against the table gently to get air bubbles out.

At this point these were set on the counter for around half an hour. I set my oven to 280 F so it could start preheating. Even though many ovens don’t take half an hour to preheat, keeping the oven on for an extended amount of time will help ensure an even cooking temperature. If you have an older model, make sure you test your oven’s temperature with an oven thermometer which is imperial to making good macarons.

While waiting, Michelle and I started on the ganache. Making ganache is simple but getting good consistency can be quite difficult sometimes. Instead of the popular 1:1 ratio between cream and chocolate, I used a 1:2 ratio which resulted in a thicker ganache that held its shape.

The actual mechanics is really simple. Start off by heating the heavy cream.

Add the cream to the chocolate chips and let it sit. After a few minutes stir it gently and you’re good to go!

Although the ganache isn’t very photogenic, the consistency was smooth. One thing I would change next time I make this ganache is processing the chips after measuring it. I ended up making way more ganache than necessary so I’ve halved the amount in the recipe below.

After the macarons had set undisturbed, a matte membrane formed on top which is necessary to form the pretty feet of the macaron. On a dry day these membranes could form as early as 15 minutes. For me 30 created a membrane that seemed just right. In more humid areas, you might need to let the shells sit for 1 to 2 hours.

This picture is in focus, it just doesn't shine due to the matte membrane.
The macarons then sat in the oven for 16 minutes. You want to bake these for at least 15 minutes. To check for doneness, attempt to lift a macaron shell. If it lifts off easily without effort, your macarons are ready. If it slightly sticks to the parchment paper, make for two more minutes at a time. You want a slighly over baked, over crisp macaron (which will be fixed in a bit). Remember those macaroons with “chunks” during pipping? This is the result of not sifting out chunks:


At this point macarons were moved onto a cooling rack and cooled.

Remember those thin membranes? Let’s check out those feet:

I pipped my ganache into the macarons and set it in the fridge to age. The idea is this: if you slightly overcook your macarons, you end up with the perfect macaron after it ages in the fridge for 24 hours. By aging the macaron, you allow the complex flavors to meld and develop. The moisture from the filling also helps reconstitute the famous chewy texture of the macaron.


I hope these tips and this new recipe and how-to has proven that macarons can be tasty and successful even when done without a stand mixer. I hope this will help you create a perfect batch of macarons. Let me know how these tips work for you in the comment section below!.
Chocolate Ganache filled French Macarons
Ingredients
Macaron Shells
- 90 gr egg whites (about 3) preferably aged 3-5 days in the fridge
- Cream of Tartar
- 25 gr (2 Tbsp) granulated sugar
- 200 gr (1 2/3 cup) powdered sugar
- 110 gr (1 1/8 cup) almonds
Chocolate Ganache
- 1/2 cup heaving whipping cream
- 1 cup Bittersweet chocolate chips
- 1/8 tsp salt
Directions
Macaron Shells
- Combine confectioners’ sugar, and almond flour. Remove as many clumps as possible.
- Whip whites gently in a circular motion with a pinch of Cream of Tartar until foamy. Add sugar slowly and start whisking normally until stiff peaks form.
- Gently add flour mixture over whites. Fold using a smooth motion until mixture is smooth and shiny. This should take no more than 50 strokes.
- Preheat oven to 280 F. Pipe 1.5 inch circles 1 inch apart onto a parchment-lined baking sheets, dragging the pastry tip from the side of rounds rather than vertically from the center. Tap bottom of each sheet on work surface to release trapped air. Let the sheets stand at room temperature for 30 minutes while the oven preheats. Bake macarons for about 15 to 20 minutes depending on their size. Macarons are done when they remove easily. If they stick slightly, return to the oven and bake for 2 more minutes and repeat until complete. Transfer to a wire rack.
Ganache
- Chop or process chocolate chips.
- Heat the heaving whipping cream, stirring frequently until it almost boils.
- Add the whipping cream to the chocolate chips and let sit for a few minutes.
- Stir in a circular motion and add the salt. Let cool completely before pipping the ganache onto macarons.
Assembly
After pairing up the macarons, pipe a layer of chocolate ganache. I tend to like mine as thin as the feet of the macaron. Let the sandwiches age in the fridge in an airtight container for 24 hours, they taste the best at this time!

Pingback: Photo Guide: Cinnamon Rolls « BoOmIe's Kitchen
oohh these look pretty!
OMG, thanks so much! I really want to make macarons but I don’t have a mixer. This post will surely help me make these by hand! Thanks again!
Pingback: Onion-ring Eggs | BoOmIe's Kitchen
Pingback: Review: ‘lette macarons | boomie's kitchen
I just made a batch of hand-whisked Meringue Cookies and was thinking about French Macaroons next. this post is surely going to be very helpful. thanks for sharing.